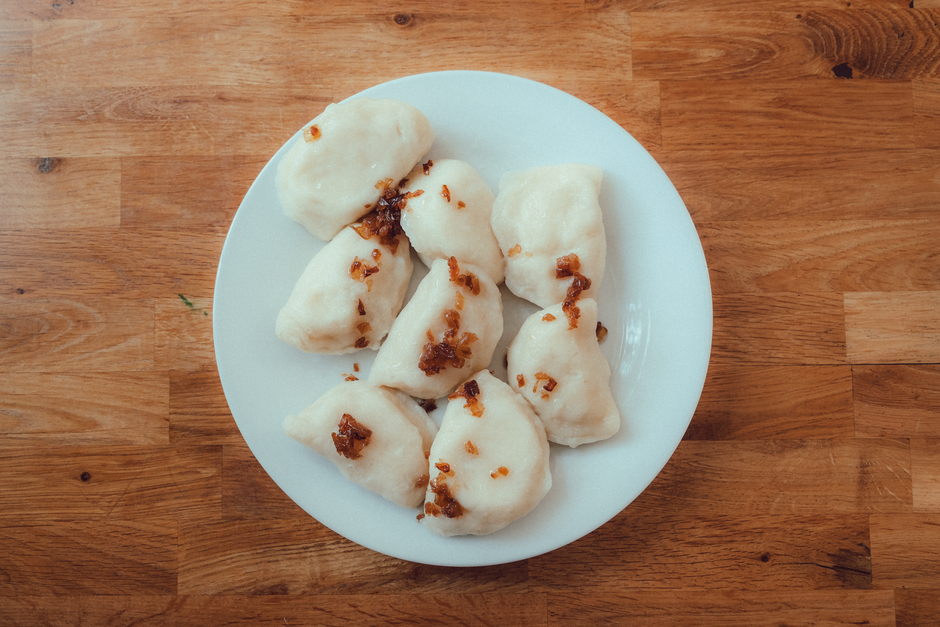
Pierogi Ruskie: Polish Dumplings with Potato and Cheese
Pierogi ruskie, often referred to as Polish dumplings filled with potato and cheese, hold a cherished place in Polish culinary tradition. These half-moon shaped dumplings are known for their soft, tender dough and a savory, comforting filling. While they may seem simple, achieving the perfect texture and flavor requires attention to detail and a methodical approach. This article explores the process of making pierogi ruskie from scratch, offering guidance on preparing the dough, crafting the filling, and mastering the folding technique.
Whether you are new to making pierogi or have some experience, understanding the foundational steps can greatly improve your results. The following sections break down each stage, from selecting ingredients to cooking and serving, with practical tips to help you create authentic-tasting pierogi ruskie in your own kitchen. The information presented here is meant to inform and guide, providing a reliable framework for your culinary exploration.
Understanding the Ingredients and Their Roles
To produce pierogi ruskie that are both flavorful and structurally sound, it is important to consider the function of each ingredient. The dough typically consists of flour, water, a small amount of oil or butter, and salt. The choice of flour can influence the texture; all-purpose flour is commonly used, but some recipes incorporate a portion of bread flour to add chewiness. The liquid component, usually warm water, hydrates the flour and helps form a pliable dough. A touch of fat, such as vegetable oil or melted butter, contributes to tenderness and makes the dough easier to roll out.
The filling is equally crucial, with potatoes and cheese as the stars. For the potato component, starchy varieties, like Russets or Yukon Golds, are preferable because they mash smoothly and absorb flavors well. The cheese, traditionally twaróg (Polish farmer’s cheese) or a dry-curd cottage cheese, lends a creamy texture and a slightly tangy taste. When these are not available, a mixture of ricotta and feta can serve as a substitute, though the flavor will differ. Onions, sautéed until golden, are often added to the filling for a hint of sweetness and depth.
Understanding the role of each ingredient helps in making informed adjustments, but it is equally important to follow the proportions carefully to maintain the intended consistency. For example, too much flour in the dough can make it tough, while too little can cause it to be sticky and difficult to handle. Similarly, the filling should be well-balanced—neither too dry nor too moist—so that it holds together during assembly and cooking.
Preparing the Dough and Filling
Making pierogi dough is a straightforward process, but attention to texture is key. Start by placing the flour and salt in a large mixing bowl. Create a well in the center and pour in the warm water and oil. Using a fork or your hands, gradually incorporate the flour into the liquid until a shaggy dough forms. Transfer the dough to a lightly floured surface and knead it for about 8 to 10 minutes, until it becomes smooth and elastic. If the dough feels too dry, add a teaspoon of water at a time; if it is too sticky, dust with a little flour. Once kneaded, wrap the dough in plastic wrap and let it rest for at least 30 minutes at room temperature. This resting period allows the gluten to relax, making the dough easier to roll and less prone to shrinking.
While the dough rests, prepare the filling. Begin by peeling and dicing the potatoes into uniform chunks, then boil them in salted water until fork-tender. Drain thoroughly and allow them to steam dry for a few minutes, which removes excess moisture. In a separate skillet, melt a small amount of butter and sauté finely chopped onions until they are translucent and lightly browned.
Once the potatoes are cool enough to handle, mash them until smooth, ensuring there are no lumps. Add the farmer’s cheese and the sautéed onions, then season with salt and freshly ground black pepper. Mix everything until well combined, tasting and adjusting the seasoning as needed. The filling should have a cohesive, slightly dense consistency that can be easily scooped and shaped. If it appears too dry, a splash of milk or a bit more melted butter can be added; if it is too soft, a spoonful of flour may help bind it.
Rolling, Filling, and Folding: Techniques for a Perfect Seal
With the dough and filling ready, the next stage involves rolling and shaping the pierogi. Divide the dough into two or three portions to keep the rest covered while working. On a lightly floured surface, roll one portion into a thin sheet, aiming for an even thickness of about 1/8 inch. Using a round cutter, such as a glass or a biscuit cutter, stamp out circles measuring approximately 3 to 4 inches in diameter. Gather the scraps, re-roll, and cut additional circles.
To fill each circle, hold it in the palm of your hand and place a generous teaspoon of filling in the center. Avoid overfilling, as this makes sealing difficult. Moisten the edges of the circle with a little water or beaten egg, using your finger or a pastry brush. Fold the circle in half, pressing the edges together to form a half-moon shape. Ensure that the filling is centered and that the edges are pressed firmly to remove any air pockets.
For a decorative edge, you can crimp the sealed edge with a fork, pressing down to create a pattern. Alternatively, use your fingers to pinch and pleat the edge, which is a traditional method that also strengthens the seal. The key is to make sure there are no gaps where the filling could escape during cooking. Place the finished pierogi on a floured baking sheet, leaving space between them to prevent sticking. If you plan to freeze them, do so on a tray in a single layer, then transfer to a freezer bag once they are solid.
Cooking and Serving Pierogi Ruskie
There are several ways to cook pierogi ruskie, with boiling being the most common. Bring a large pot of salted water to a rolling boil and carefully slide in the pierogi in batches, avoiding overcrowding. Stir gently with a wooden spoon to prevent them from sticking to the bottom. Cook for about 3 to 5 minutes after they float to the surface, depending on the thickness of the dough and whether they are fresh or frozen. Fresh pierogi will cook faster, while frozen ones may require a minute or two longer. The pierogi are done when they float and the dough appears cooked through with a slightly translucent appearance.
Once boiled, remove them with a slotted spoon and let them drain. At this point, they can be served immediately, often topped with caramelized onions and a dollop of sour cream. Another popular variation is to pan-fry the boiled pierogi in butter until they are golden brown on both sides, which adds a delightful crispness. This can be done in a skillet over medium heat, cooking each side for about 2 to 3 minutes.
The flavor of pierogi ruskie is mild and comforting, making them a versatile dish that can be enjoyed as a main course or a side dish. They pair well with a variety of accompaniments, such as bacon bits, fresh herbs like dill or parsley, or even a light mushroom sauce. Because they are quite filling, portion sizes should be considered; typically, four to six pierogi per person is reasonable for a meal, while smaller quantities may suffice for appetizers.
Tips for Consistent Results and Storage
To achieve consistent results, it is useful to follow a few practical guidelines. First, keep the dough covered with a damp cloth or plastic wrap whenever you are not actively working with it. This prevents it from drying out and cracking, which can make folding difficult. Second, be mindful of the moisture level in the filling; overly wet filling can make the dough soggy and prone to tearing. If your potatoes release excess water, ensure they are well-drained and mashed thoroughly.
When storing uncooked pierogi, arrange them in a single layer on a floured tray and refrigerate for up to 24 hours. For longer storage, freeze them as described earlier. It is important to note that frozen pierogi should be cooked from frozen, not thawed first, to prevent them from turning mushy. Adjust the boiling time accordingly.
If you happen to have cooked leftovers, they can be refrigerated for a couple of days. To reheat, pan-frying in a little butter is often preferable to microwaving, as it helps revive the texture. Pierogi also freeze well after being boiled; simply lay them on a tray, freeze, and then store them in a bag for up to a few months. Reheat them directly from the freezer in a skillet or in the oven.
Exploring Variations and Serving Ideas
While this guide focuses on the classic potato and cheese filling, pierogi dough is a versatile canvas for many other fillings. You might explore variations such as sauerkraut and mushroom, meat, or even fruit-based fillings for a sweet twist. Each filling requires a different approach, but the dough preparation remains largely the same. This adaptability makes pierogi a wonderful dish for experimentation.
In terms of serving, pierogi ruskie are often enjoyed with a dollop of sour cream and a sprinkle of crispy fried onions. Some prefer to serve them with a side of fresh salad or pickled vegetables to cut through the richness. For a more indulgent presentation, a drizzle of melted butter and a dusting of chopped chives can add elegance. The choice of accompaniments depends largely on personal preference and regional traditions, but the dish is characteristically simple and hearty.
Making pierogi is a labor of love that rewards patience and attention to detail. While the process may seem time-consuming, the satisfaction of creating a batch of beautifully folded dumplings is undeniable. Each step, from kneading the dough to crimping the edges, contributes to the final texture and taste.
Ultimately, pierogi ruskie are a testament to the beauty of simple, wholesome ingredients prepared with care. By following the techniques outlined in this article, you can develop a reliable method for making these beloved dumplings. With practice, you will likely find your own rhythm and perhaps even innovate your own filling combinations. The key is to approach the process with curiosity and a willingness to learn, as each batch offers an opportunity to refine your skills.